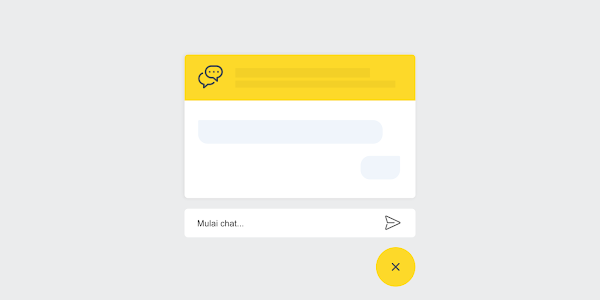
Looking for professional Whatsapp Chat widget for blogger. Then you're at right place - Build Whatsapp Chat widget using HTML, CSS only.
Hello! Welcome to ROBO© - Widget Tutorials. Today we're going to build a whatsapp chat widget for blogger easily using HTML, CSS only. This can be very simple (of course, It is!). We'll build this widget in step by step guide. So, follow the easy steps and learn more about how to add a whatsapp chat widget in the Blogspot.

A Whatsapp Chat widget can be very helpful even more beneficial while chatting with users and promoting products through Affiliate Marketing. So, let's start...
Why we need it?
You may know why a whatsapp chat widget important for your blog, but unfortunately, if you have not heard before about it, then, do not worry! I'm here to help you.
These days WhatsApp is one of the easiest and popular messenger applications in the world. Its popularity almost in all countries except China. And according to researches, Whatsapp will be more popular, in the future, here only reasons that it provides the easiest way of communication in different ways. Such as text messages, video calling, Audio call and audio recorded clips, etc.
Whatsapp Chat Widget - Features
- Your readers can easily connect to you and quickly solve their particular problems with it instead of a contact us page.
- It generates a funnel where you can keep in touch with your clients.
- It also helps to collect information such as phone number and location. That means it helps in retargeting your clients.
- It brings traffic and subscribers.
- It helps to generate more sales on your blog.
In the technological era, people like an easy way to communicate with others. So, having a Whatsapp chat widget, messenger chat widget, or any other social media chat widget on your blog is the best way to connect with your clients and helps them.
Steps to Add Whatsapp Chat Widget For Blogger
Now it's time to add a whatsapp chat widget for our blogger blog with full listed steps...
Step 1 - CSS
First you have to do is, Go to the Edit HTML template menu and add the CSS code below to the CSS code group on your blog.
/* Chatbox Whatsapp */
:root {
--warna-background: #4dc247;
--warna-bg-chat: #f0f5fb;
--warna-icon: #fff;
--warna-text: #505050;
--warna-text-alt: #989b9f;
--lebar-chatbox: 320px;
}
svg{width: 22px;height: 22px;vertical-align: middle;fill: var(--warna-icon)}
.chatMenu, .chatButton .svg-2{display: none}
.chatButton{position: fixed;background-color: var(--warna-background);bottom: 20px;left: 20px;border-radius: 50px;z-index: 20;overflow: hidden;display: flex;align-items: center;justify-content: center;width: 50px;height: 50px;-webkit-transition: all .2s ease-out;transition: all .2s ease-out}
.chatButton svg{margin: auto;fill: var(--warna-icon)}

.chatBox{position: fixed;bottom: 70px;left: 20px;width: var(--lebar-chatbox);-webkit-transition: all .2s ease-out;transition: all .2s ease-out;z-index: 21;opacity: 0;visibility: hidden;line-height: normal}
.chatContent{border-radius: 15px;background-color: #fff;box-shadow: 0 5px 15px 0 rgba(0,0,0,.05);overflow: hidden}
.chatHeader{position: relative;display: flex;align-items: center;padding: 15px 20px;background-color: var(--warna-background);overflow: hidden}
.chatHeader svg{width: 32px;height: 32px;flex-shrink: 0;fill: var(--warna-icon)}
.chatHeader .chatTitle{padding-left: 15px;font-size: 14px;color: var(--warna-icon)}
.chatHeader .chatTitle span{font-size: 11.5px;display: block;line-height: 1.58em}

.chatText{display: flex;flex-wrap: wrap;margin: 25px 20px;font-size: 12px;color: var(--warna-text)}
.chatText span{display: inline-block;margin-right: auto;padding: 10px 10px 10px 20px;background-color: var(--warna-bg-chat);border-radius: 3px 15px 15px}
.chatText span:after{content: 'Just now';margin-left: 15px;font-size: 9px;color: var(--warna-text-alt)}
.chatText .typing{margin: 15px 0 0 auto;padding: 10px 20px 10px 10px;border-radius: 15px 3px 15px 15px}
.chatText .typing: after{display: none}

.chatStart{display: flex;align-items: center;margin-top: 15px;padding: 18px 20px;border-radius: 10px;background-color: #fff;overflow: hidden;font-size: 12px;color: var(--warna-text)}
.chatMenu:checked + .chatButton{-webkit-transform: rotate(360deg);transform: rotate(360deg)}
.chatMenu:checked + .chatButton .svg-1{display: none}
.chatMenu:checked + .chatButton .svg-2{display: block}
.chatMenu:checked ~ .chatBox{bottom: 90px;opacity: 1;visibility: visible}
Description
In the section : root {} you can change the header color, icon and widget width to your liking. Also change the text left which has been marked with right to change the position of the widget so that it is on the right.
Step 2 - HTML Code
There are two options for placing this HTML code, the first is the easiest one on the Blogger Layout menu, add a new HTML widget in the sidebar and paste all the HTML code below. The second is to paste all the HTML code below before the tag </body>, it's all the same, it's up to you to choose which method.
We've uploaded download button to download original HTML code with full steps listed inside, Just download it and implement.
At this point, your whatsapp chat widget has been completely created, if you follow all the steps correctly we can guarantee that the Whatsap chat widget is working properly. If there are questions or sections that are not understood, please write down questions through the comments column provided.
We protect our files to safe content from malware. Therefore, files are password protected. To get password, you must fill Password Request Form and get your password.
Reference : ROBO© - Widget Tutorials
© Quikthemes | Reserved